How to Decorate an Easter Egg 3 Ways
Confectionery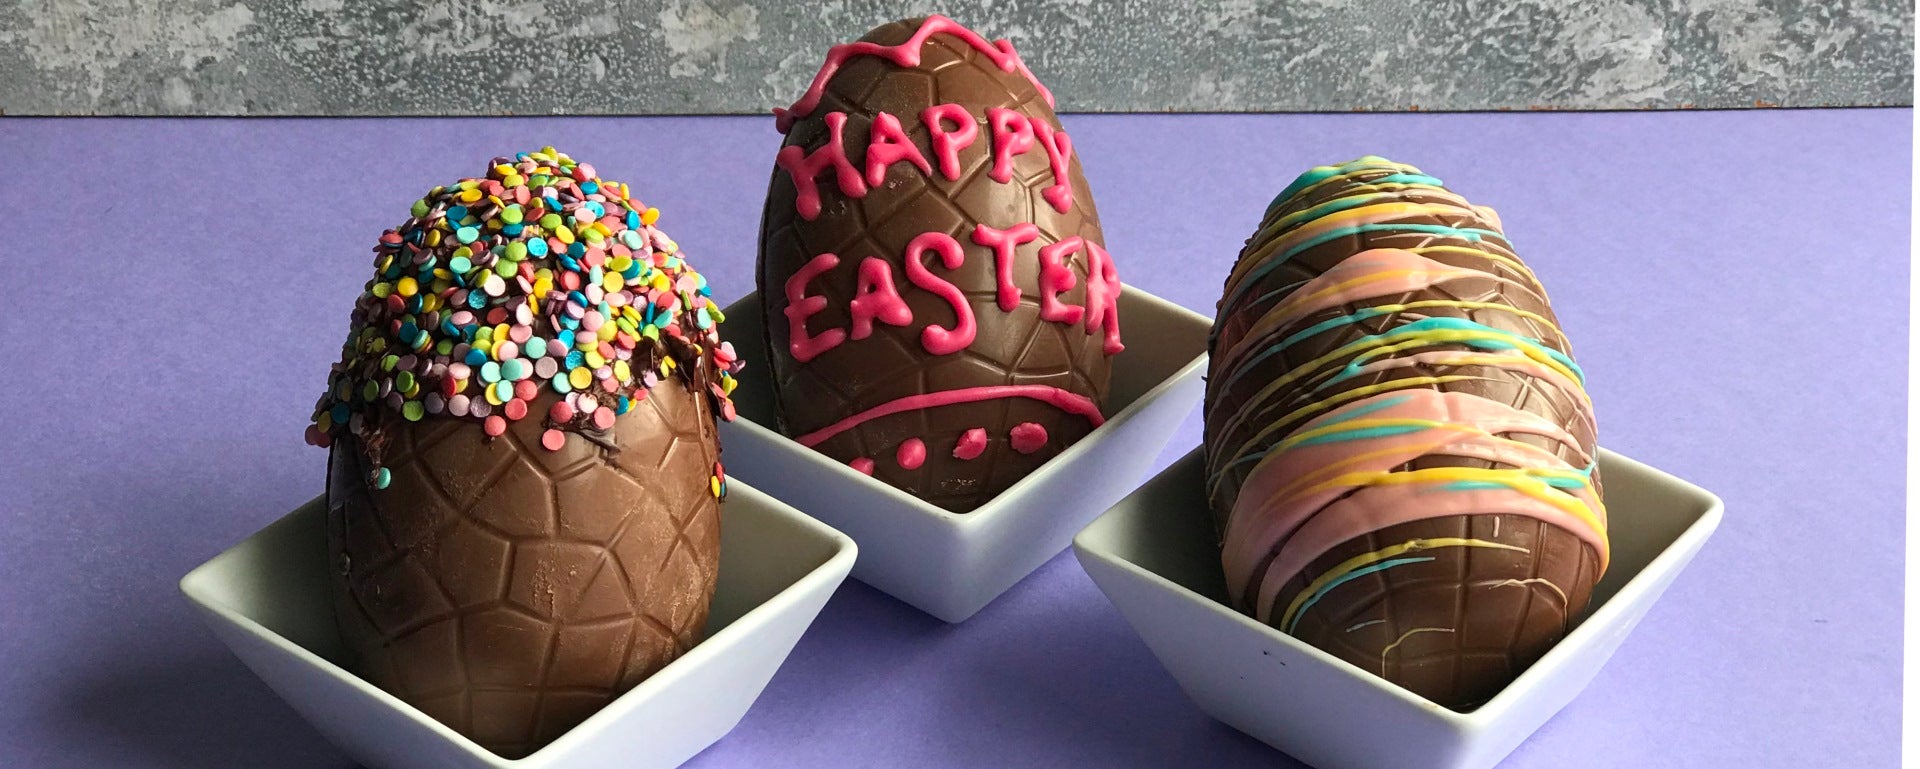
Why settle for an ordinary chocolate egg this Easter when you could customise your Easter Eggs with these 3 simple techniques; rainbow sprinkles, multicoloured drizzle or simply just whip up some icing and personalise you eggs with names or Easter greetings.
Method
Step 1
How to Create A Multicoloured Drizzle Effect:
Select three different coloured Candy Melts and melt them in the microwave in seperate bowls. Remove your Easter Egg from the wrapping. You may want to place the egg on some greaseproof paper to prevent your kitchen from getting messy.Step 2
Using a teaspoon scoop some of the melted chocolate from the bowl and flick your teaspoon forward and back over the Easter Egg, with the tip of the teaspoon pointing downwards. You may want to practice on some greaseproof paper before applying to your egg.
Repeat the process with the other chocolate colours until you have created a pattern that you are happy with. Leave the egg to dry. You could prop it upright on a ramekin to prevent it from rolling away.Step 3
How to Create A Rainbow Sprinkles Effect:
Measure out some sprinkle decorations and chocolate in two large bowls. Unwrap the Easter Egg from the foil ready to decorate.Step 4
Melt the chocolate; either in a microwave or a bain marie over a saucepan of simmering water.
Step 5
Before the chocolate sets, dip the top of the Easter Egg into the bowl, covering between a third to half of the Easter Egg in the melted chocolate. This will acts as a glue to stick the sprinkles in place.
Step 6
Dip the chocolate coated part of the egg into a bowl of sprinkles. Rotate the egg around the bowl to ensure that there is even coverage of the sprinkles. You can always patch up any gaps by sticking on more sprinkles with your hand.
Step 7
Place the egg in a ramekin or small bowl to keep it upright and leave to set.
Step 8
How to Personalise an Egg with Icing Writing:
Unwrap your Easter Egg and place on one side. In a bowl, pour out some icing sugar.Step 9
Mix up some icing by adding a few drops of water to the icing sugar and mixing up with a spoon. Only add a tiny amount to start with and then gradually add more if you need to loosen up the mixture. You ideally don't want the icing to be too runny otherwise it will be tricky to pipe and may run off your egg. You can always add more icing sugar to thicken or more water to make it runnier.
Step 10
If you would like to colour your icing, use a toothpick to add a small amount of food gel to the icing. Stir up the icing with a teaspoon to distribute the colour evenly. Add more colour if necessary to make the icing darker. If you are using liquid food colouring this may change the consistency of your icing, making it runnier so you may need to mix in more icing sugar to thicken the icing again.
Step 11
Once you have coloured the icing, use a teaspoon to scoop it into a piping bag fitted with a small point nozzle. Snip off the end of the icing bag to begin piping.
Step 12
Practice piping your name or message onto greaseproof paper to get used to the nozzle and thickness of the icing. It is easier to pipe your egg laying flat rather than upright. To hold it into place try gently positioning your egg between two objects whilst you pipe. Allow your writing to set by leaving your egg, positioned upright in a ramekin or small bowl before wrapping up (if you are gifting this) otherwise the writing icing may smudge.