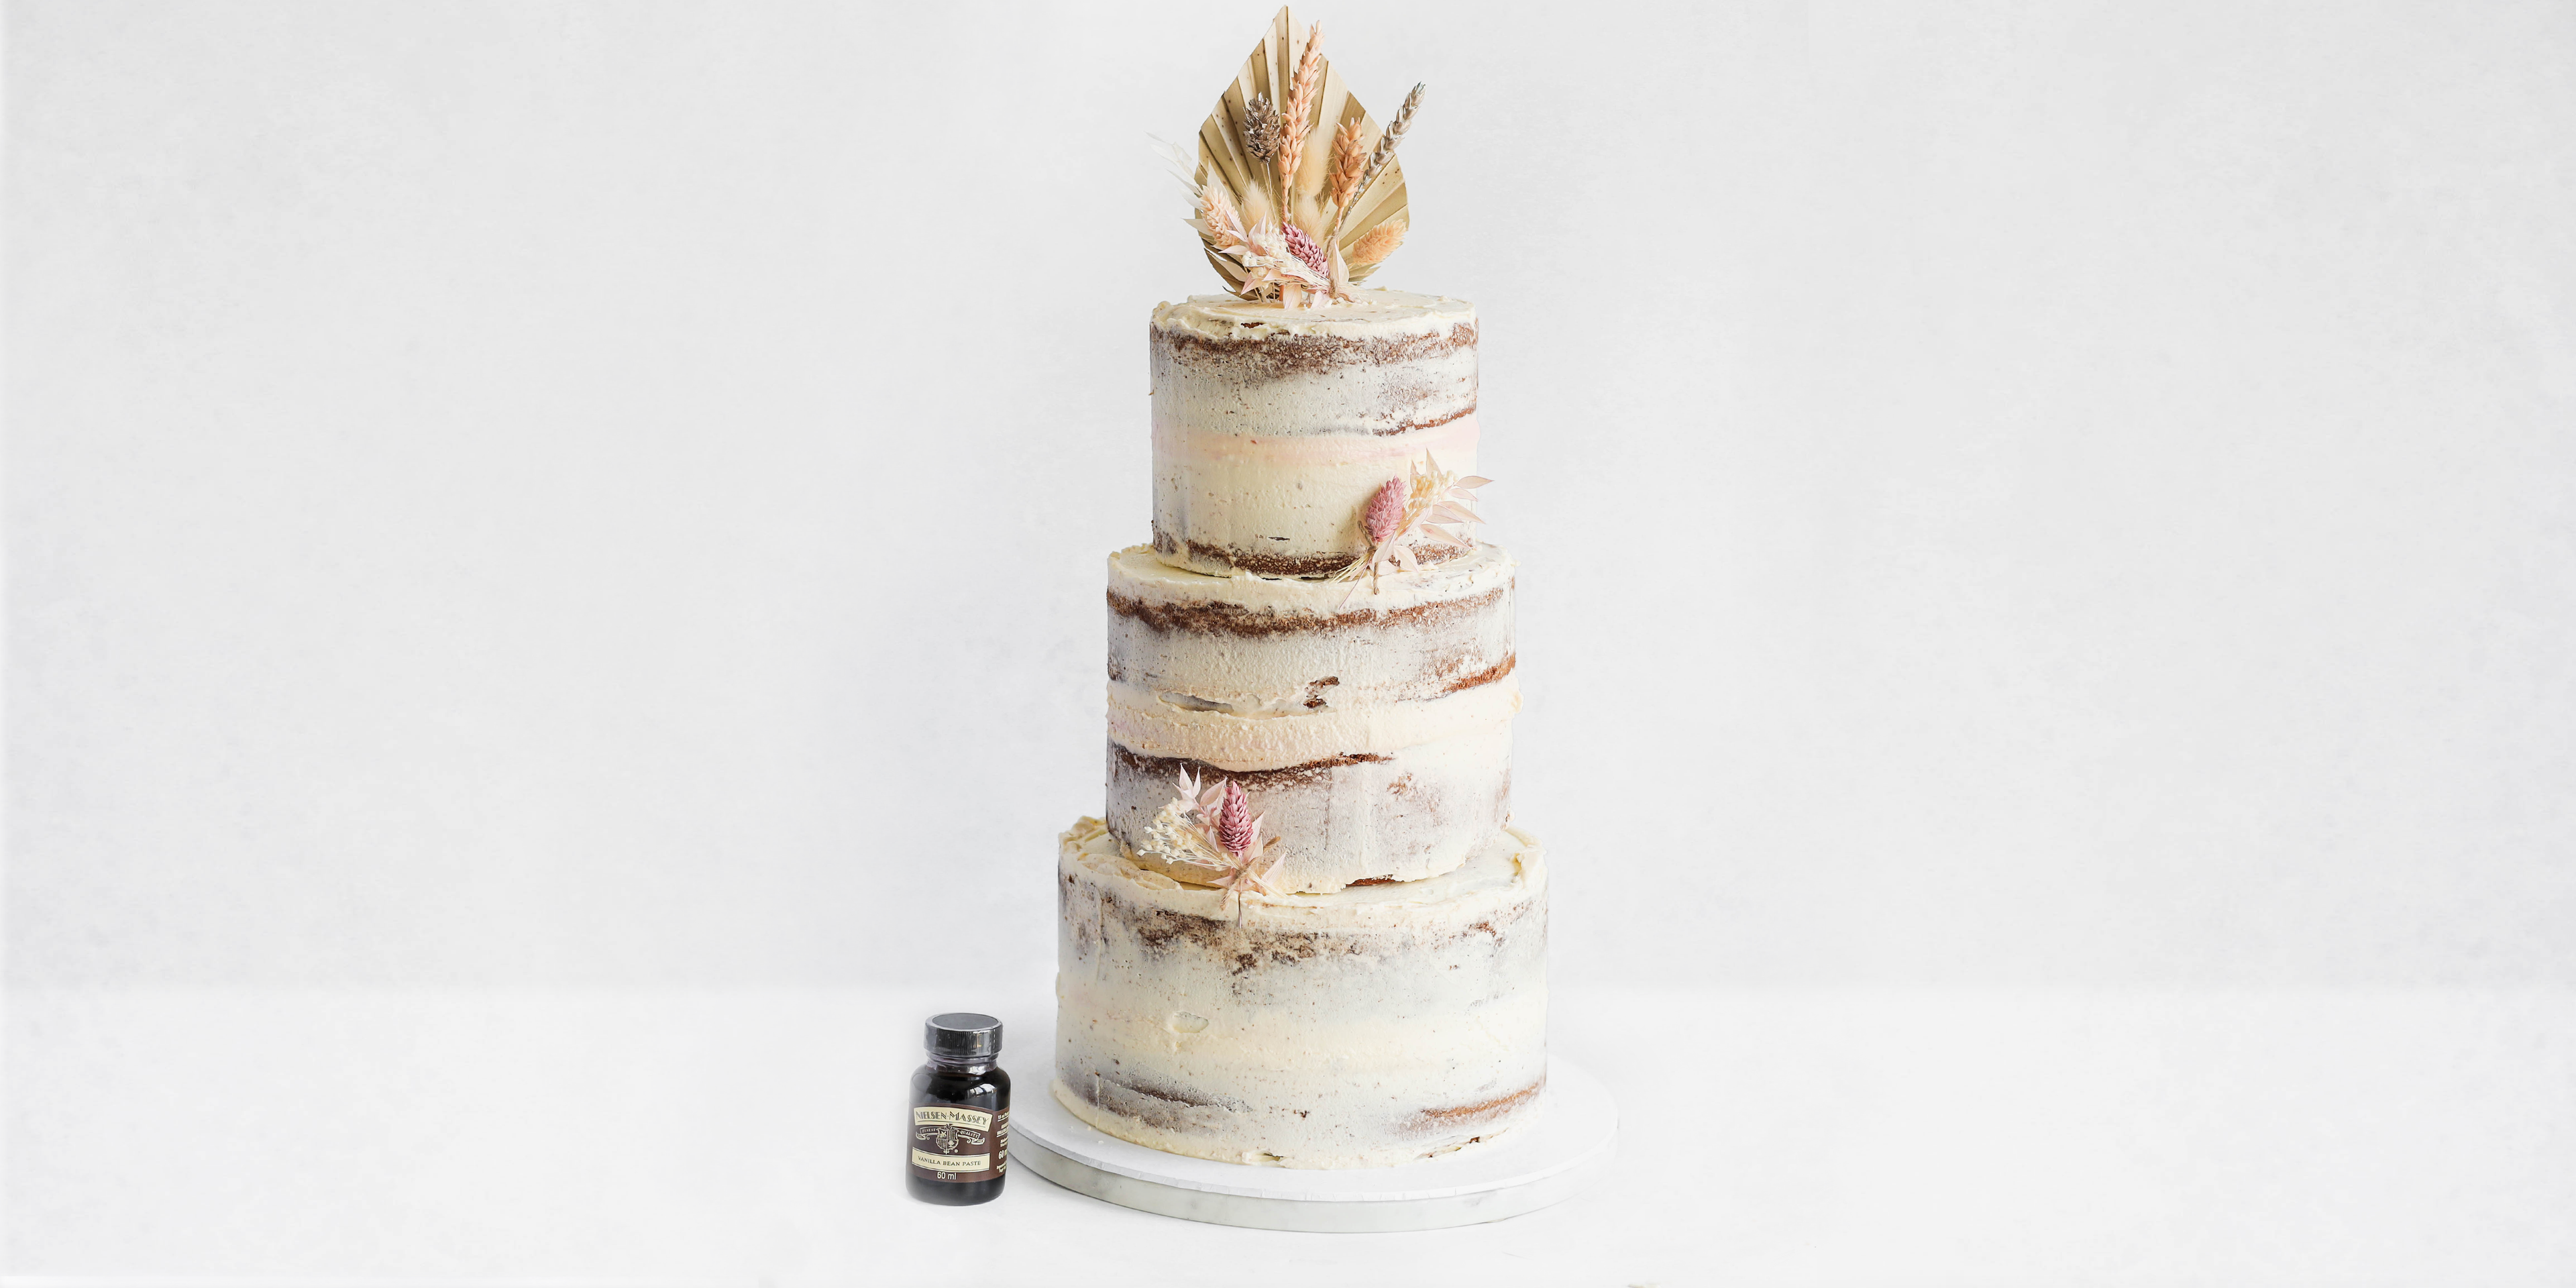
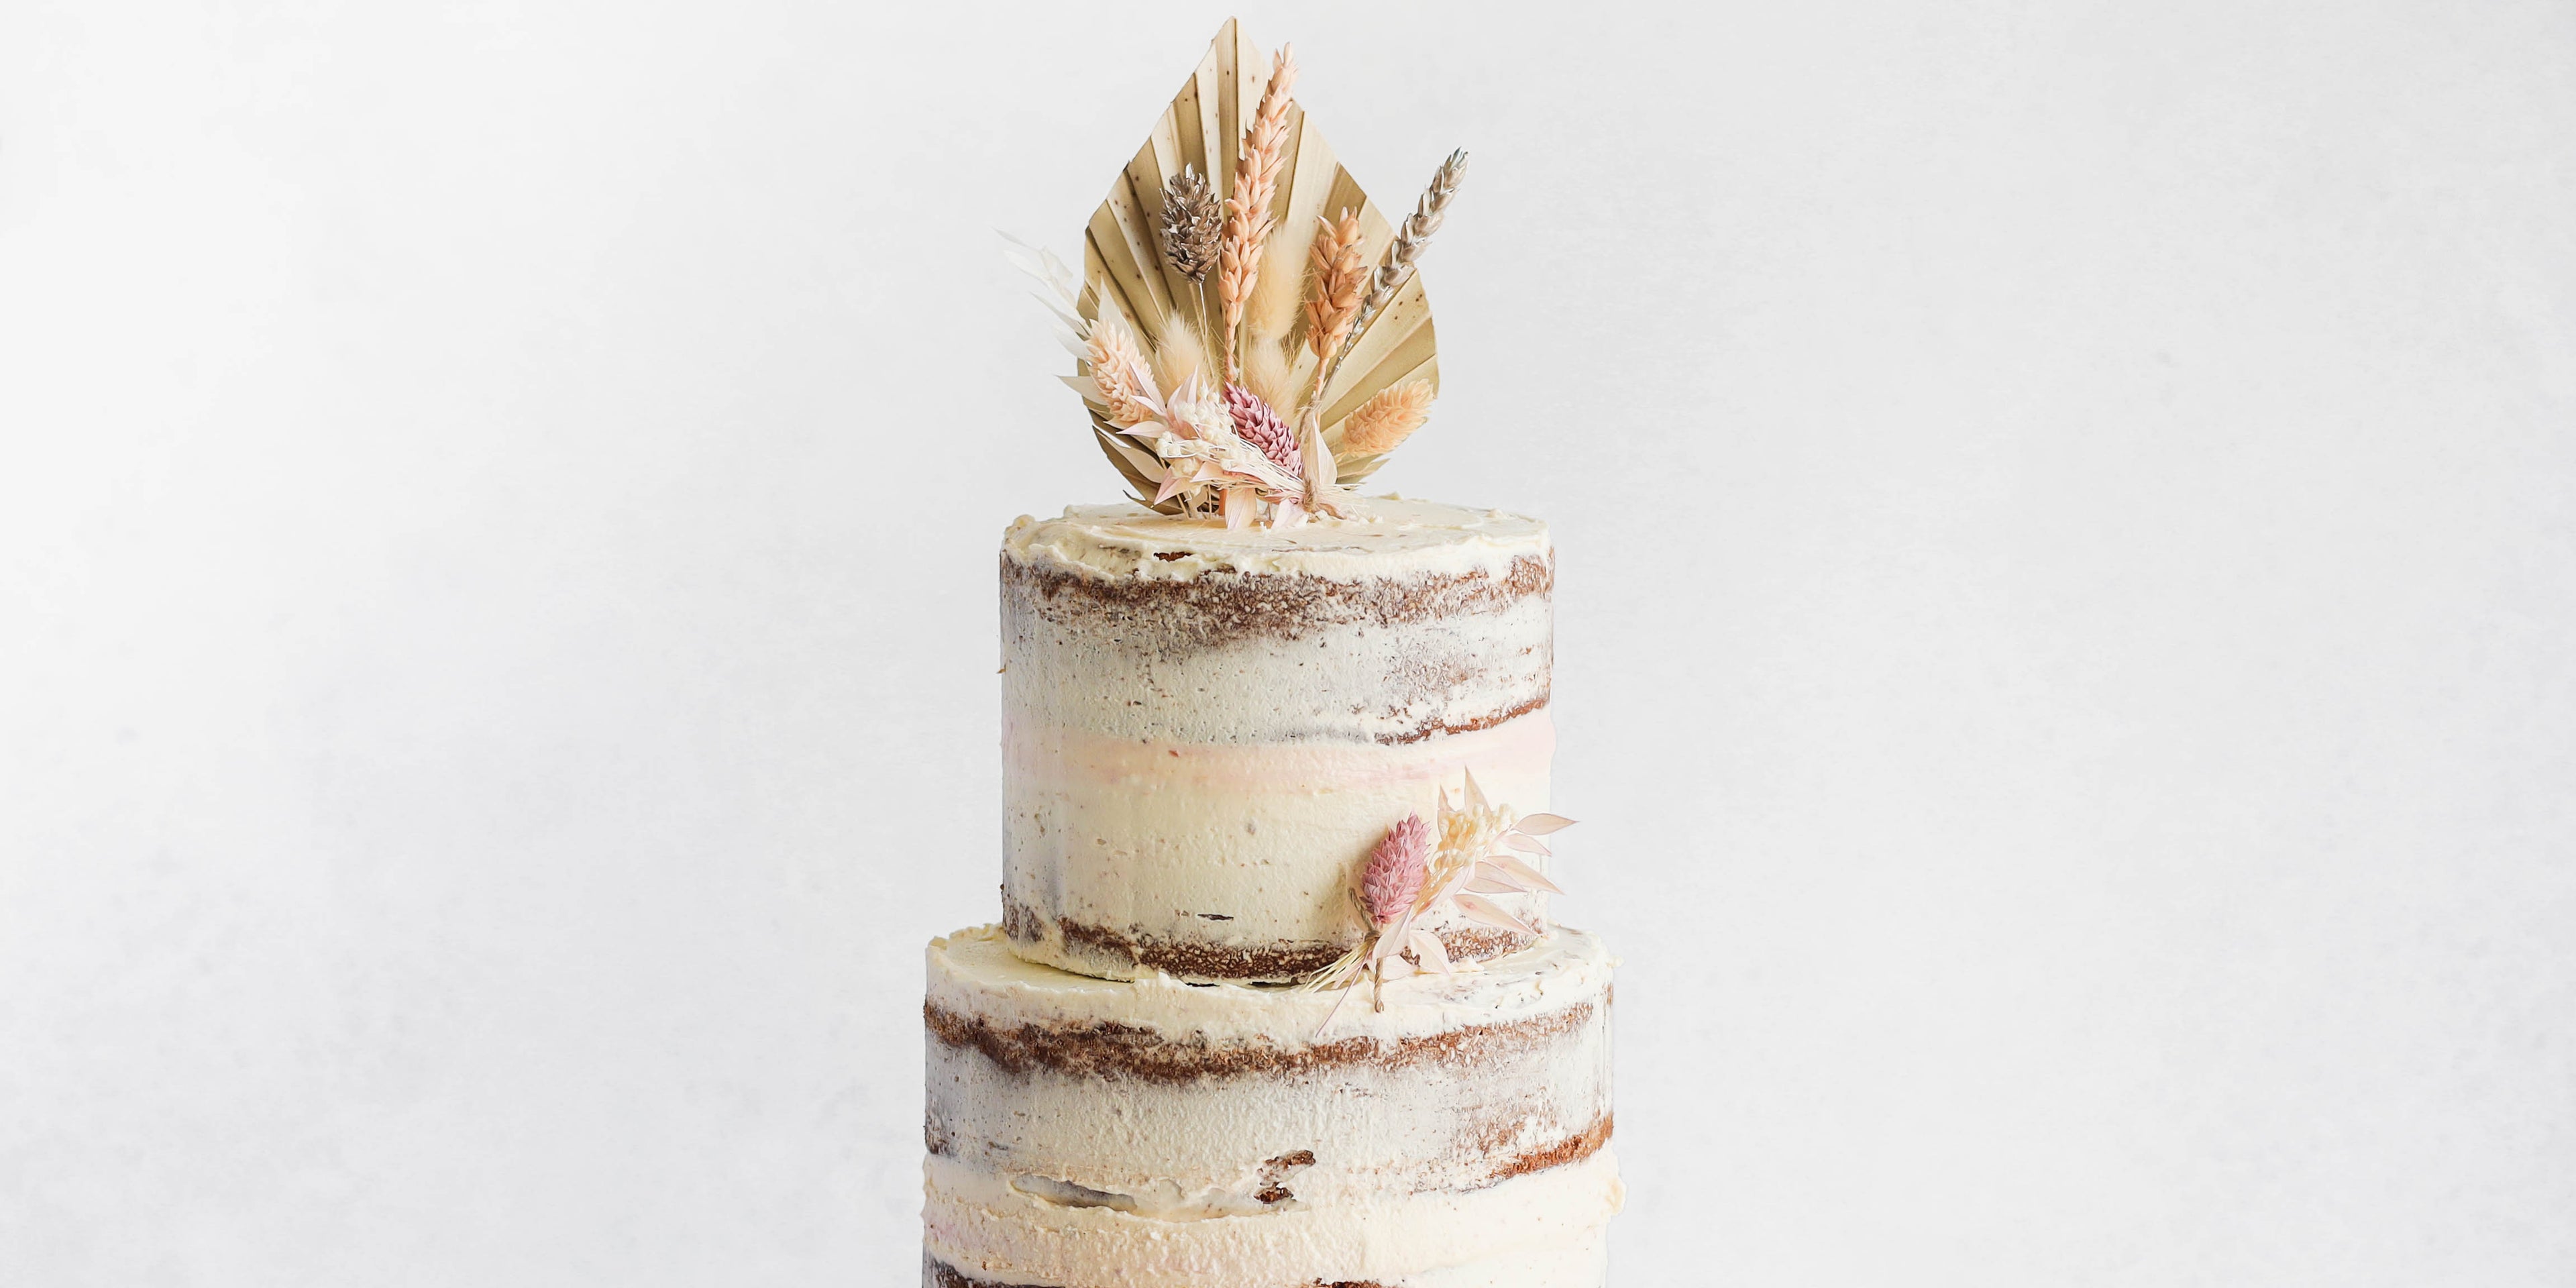

Naked Vanilla Celebration Cake
14 Reviews


About our naked vanilla celebration cake
The simple, stripped-back naked vanilla celebration cake allows the taste to really do the talking and the velvety Nielsen-Massey vanilla buttercream says it all. Sleek and stylish. Sweet and moreish. This cake works on so many levels; ideal for bakers less confident in cake decorating or tasters who aren’t that fond of fondant.
Dress up with flowers or unique cake toppers or dress down like the naked title implies. Either way this is a recipe you will turn to for every baking occasion for that wow factor.
Ingredients
For the Sponge
- 1700gUnsalted Butter (softened)
- 1700gSilver Spoon Caster Sugar
- 4 tbspNielsen-Massey Vanilla Bean Paste
- 34Egg(s) (free range) (medium)
- 1700gAllinson's Self-Raising White Flour
For the Buttercream
- 2kgSilver Spoon Icing Sugar
- 1kgUnsalted Butter (softened)
- 2 tbspNielsen-Massey Vanilla Bean Paste
- 1 tbspStrawberry jam
- 2 tspStrawberry coulis
Method
Step 1
You will need to prepare 2 x 6 inch, 2 x 8 inch and 2 x 10 inch cake tins by greasing them and lining with baking parchment. You will probably be unable to make all of the mixture in one go as it will be too large, so split the ingredients evenly into a manageable size.
Step 2
Preheat the oven to 200°C (fan 180°C, gas mark 6).
Step 3
First beat the butter, sugar and vanilla paste slowly until combined in a stand mixer and then beat on fast for a couple of minutes until pale and fluffy. You can use a bowl and wooden spoon but you need to allow extra time for beating.
Ingredients for this step
- 1700gUnsalted Butter (softened)
- 1700gSilver Spoon Caster Sugar
- 4 tbspNielsen-Massey Vanilla Bean Paste
Step 4
Add your beaten egg a little at a time, slowly mixing until it is all incorporated. If the mixture curdles, add a tablespoon of flour when needed.
Ingredients for this step
- 34Egg(s) (free range) (medium)
- 1700gAllinson's Self-Raising White Flour
Step 5
Slowly add in the flour, scrape the bowl to make sure the bottom of mixture is well mixed. Make sure not to over beat.
Step 6
Spoon evenly into the tins, weighing the mixture before adding to each tin to ensure they are even. The 6 inch cake needs 600g of mixture in each tin, the 8 inch needs 1kg in each and the 10 inch needs 1.8kg of the mixture in each tin. Put your tins in the oven.
Step 7
The smaller cakes will cook quicker. Put the oven on for 25 minutes and then begin checking the smaller ones first, every 10 minutes or so. Check they are cooked with a sharp knife or skewer in the centre of the sponge and be springy to touch with a golden crust.
Step 8
Once cooked, turn on to wire rack. Once cool if not using the same day, double wrap in clingfilm and freeze if needed. These will keep well for up to a month in the freezer.
Step 9
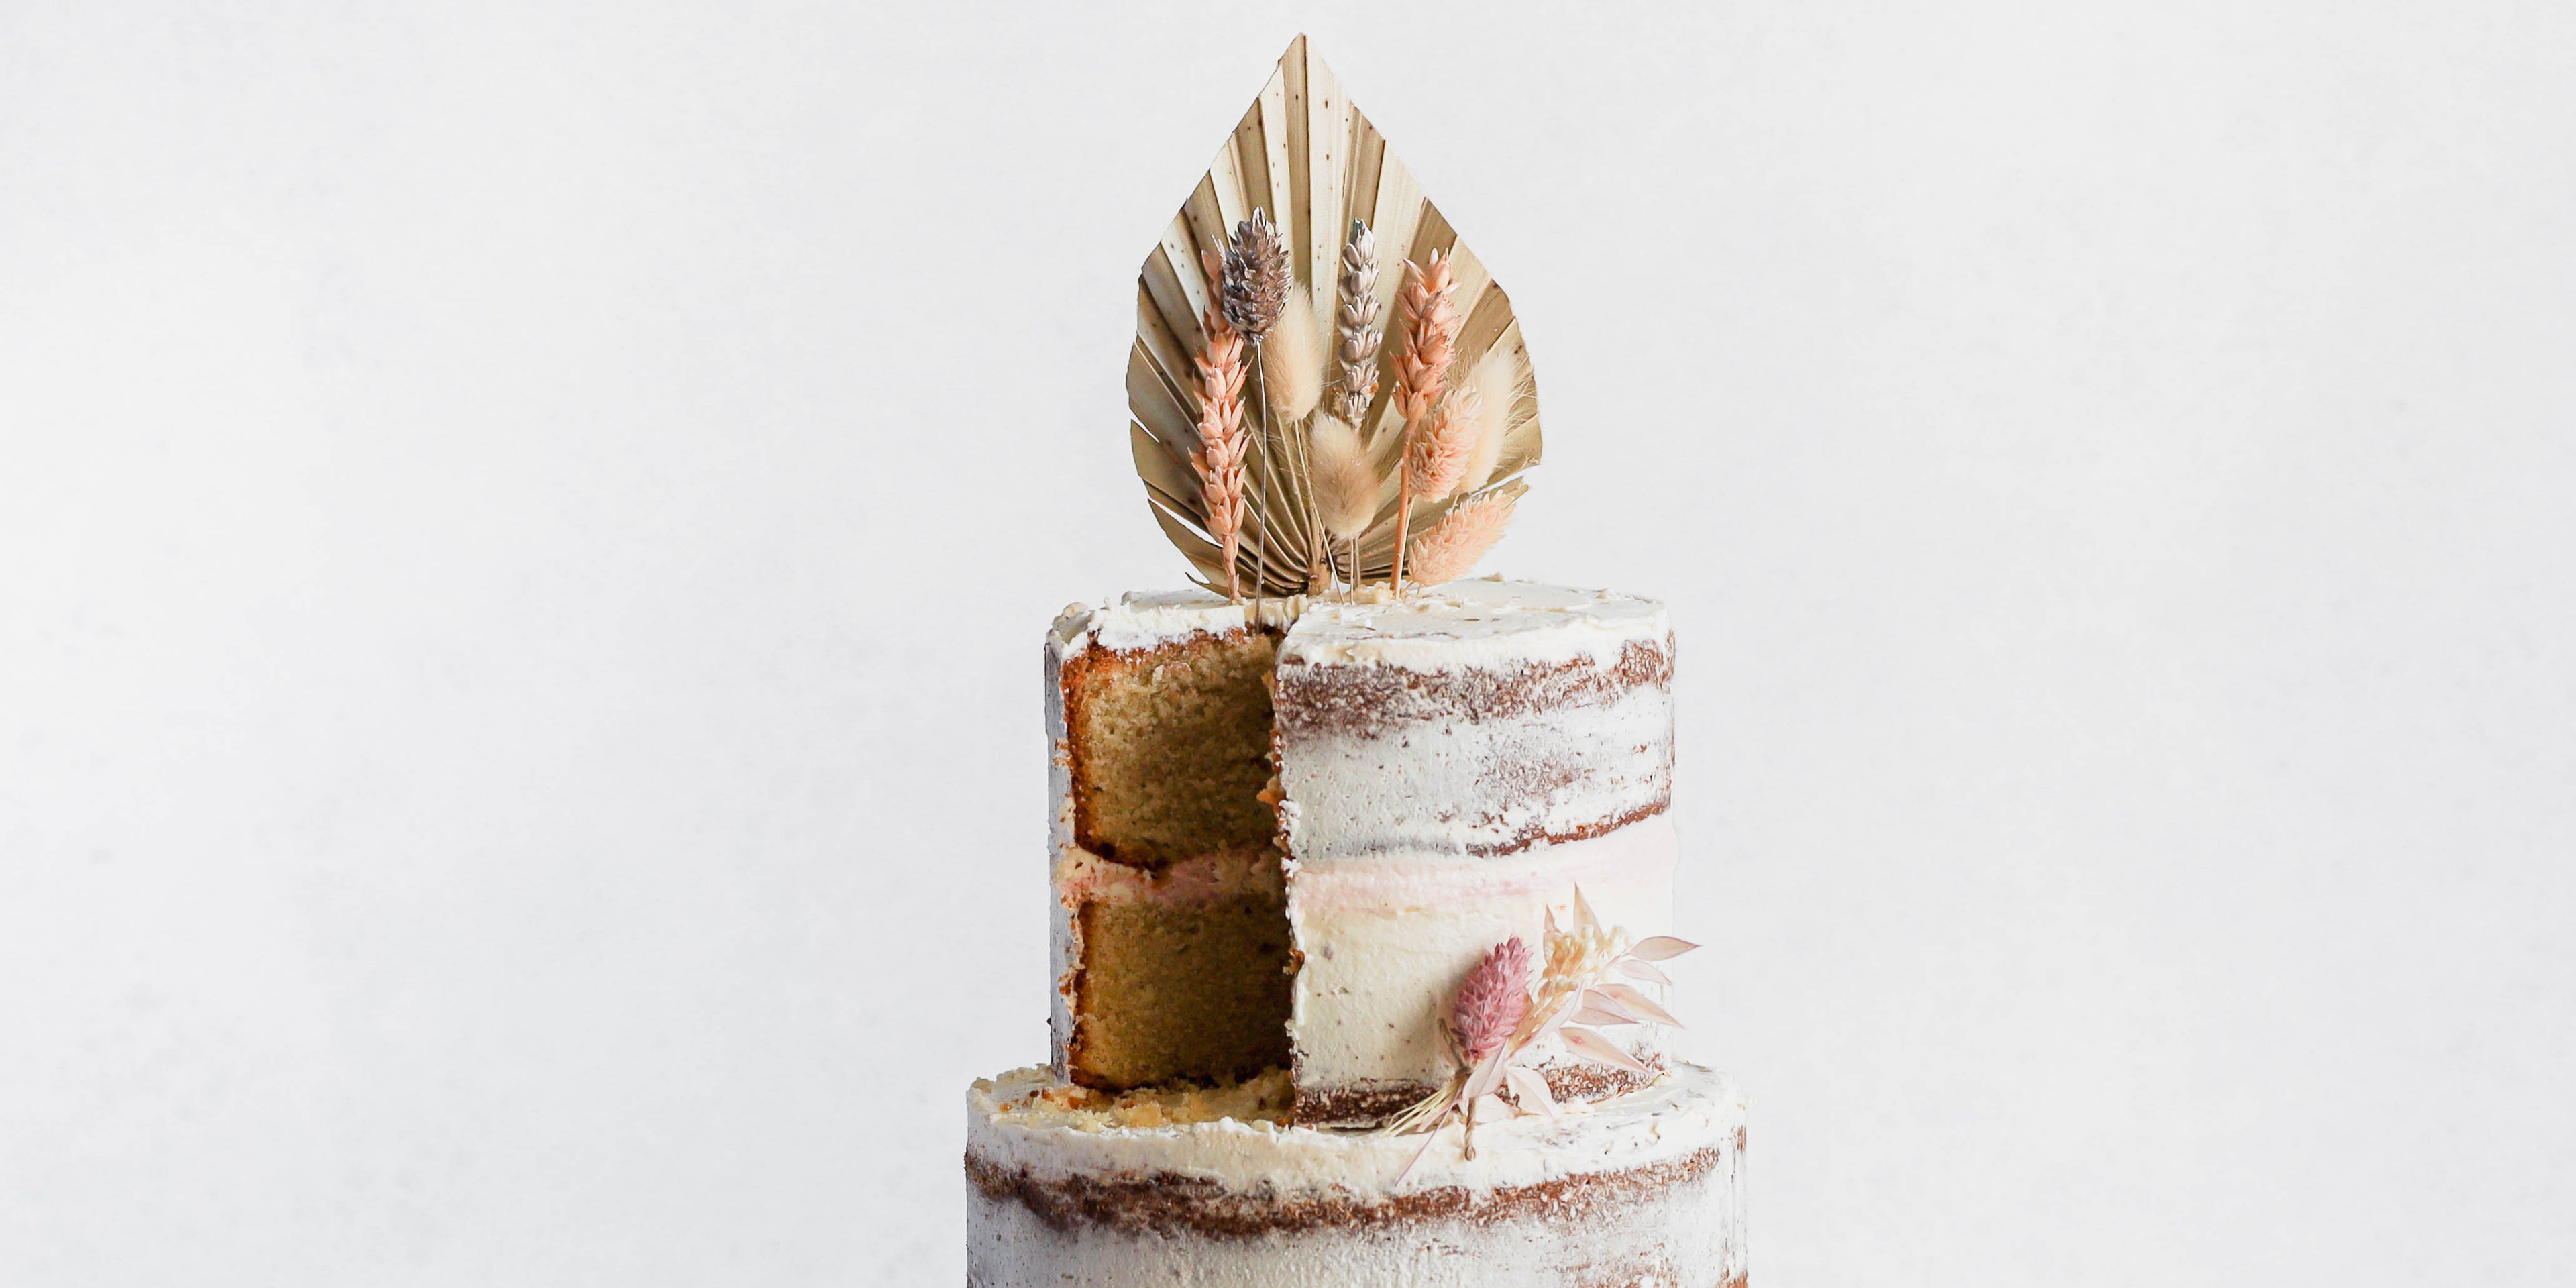
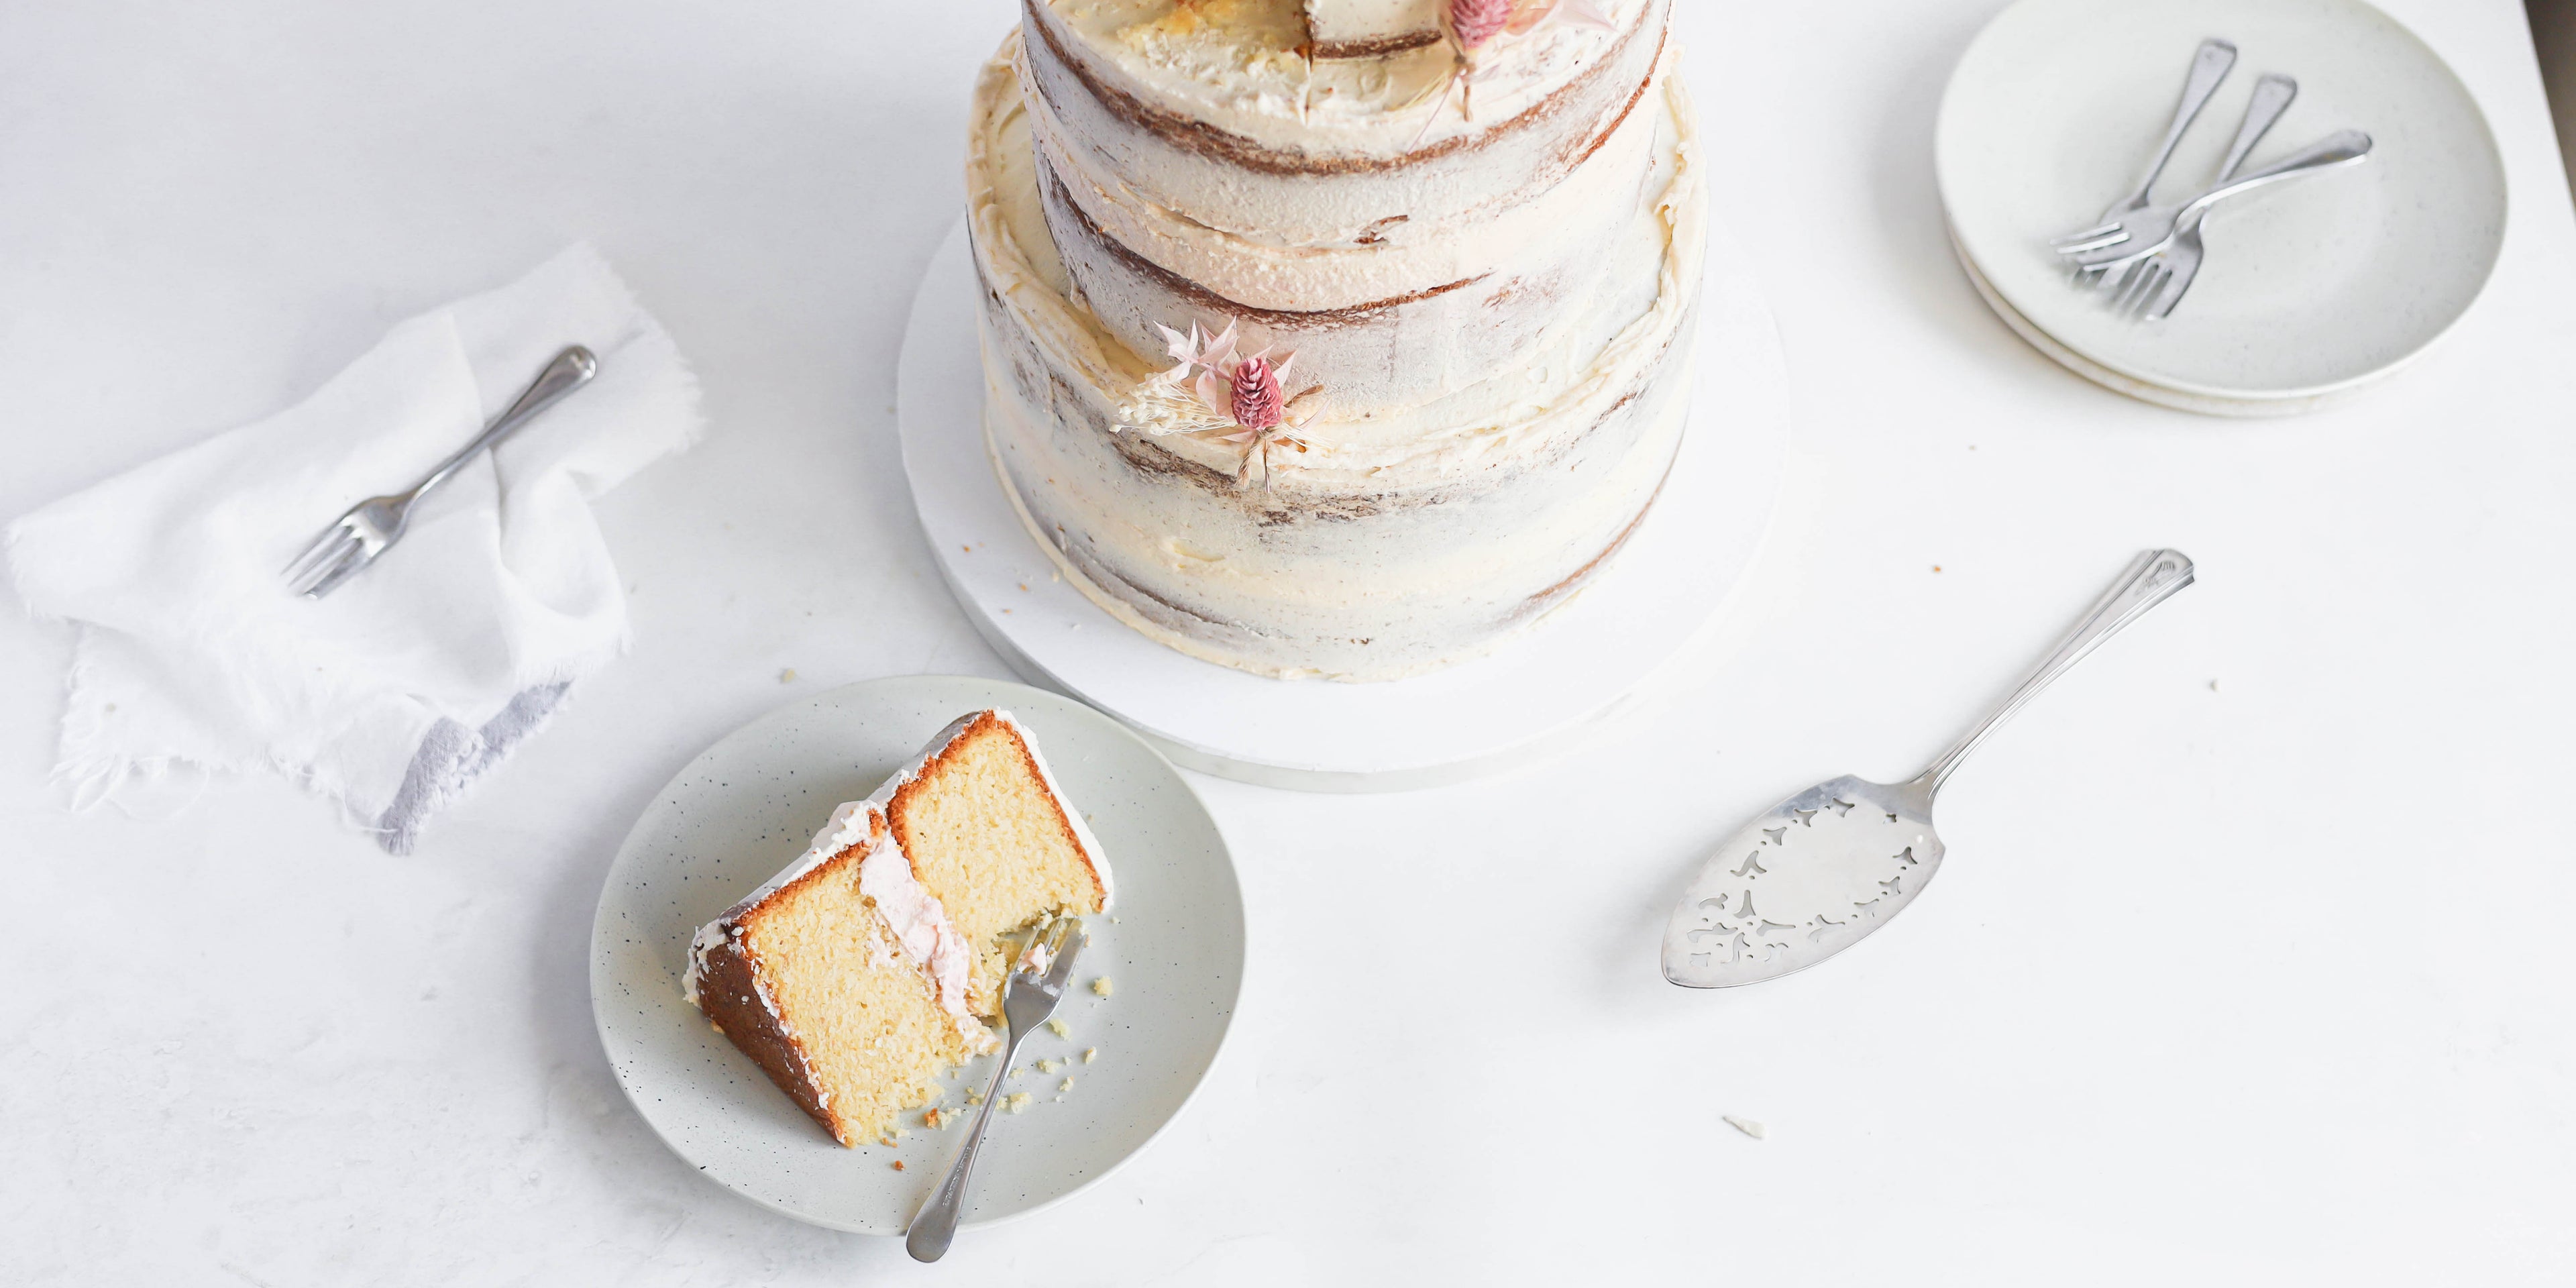
For extra height and indulgence, you can split each cake in half horizontally, allowing you to add an extra layer of buttercream in between each half.
Step 10
You can make your favourite buttercream to sandwich the sponges together. This recipe uses a basic vanilla buttercream, with half of the mixture coloured with strawberry jam and some French strawberry coulis to make alternative coloured layers. For a Winter cake, you may want to make a caramel flavoured buttercream for more of a Winter feel.
Step 11
To make the buttercream, cream the soft butter until pale soft and lighter in colour with the vanilla bean paste.
Ingredients for this step
- 1kgUnsalted Butter (softened)
- 2 tbspNielsen-Massey Vanilla Bean Paste
Step 12
Then add your icing sugar in small parts, about one quarter at a time, slowly mixing to begin with and then turn up the speed until the mixture is very pale and fluffy. Repeat until it's all mixed in.
Step 13
Split the mixture in half and add the strawberry jam and coulis to one half of the buttercream.
Ingredients for this step
- 1 tbspStrawberry jam
- 2 tspStrawberry coulis
Step 14
Put the two buttercreams in to two separate piping bags and start sandwiching your sponges together, with alternate layers of strawberry and vanilla buttercream. You could also do this with a pallet knife instead of a piping bag if you prefer. Use the remaining buttercream to smooth around the outside and top of your sponges. This will only partially cover the sponge to give the naked cake effect.
Step 15
Then you just need to layer the cakes. For this you will need some cake dowels and two thin cake drums an inch smaller than your two smallest cakes so 7 inch and 5 inch. Place about 5 cake dowels into the largest cake at least an inch from the edge of the cake.
Step 16
Push the dowels as far down as they can go and then make a mark with a pencil on the dowels just at the top of where they are poking out of the top of the cake. You will then need to cut the dowels down to this size. Make sure that all of the dowels are even and then pop the dowels back into the cake.
Step 17
Place the second cake on the 7 inch drum (it is one inch smaller than the cake to stop you from seeing it) and then carefully place the second layer on top of the bottom layer. If you have a third tier, you will need to take the second tier back off and add the dowels to support the top later in exactly the same way.
Step 18
Once the cake is fully layered, decorate it how you wish. You could add fruit, edible flowers or cake toppers for decoration, sticking them on, if necessary, with a bit of buttercream.